Crispy, Nutty, and Coated in Rich Chocolate
Servings & Timing
- Prep Time: 30 minutes
- Chill Time: 1 hour
- Total Time: 1 hour 30 minutes
- Yield: About 25 truffles
Dietary Tags: Vegetarian | No-Bake | Festive Treat
Ingredients Checklist
- 1 ½ cups crushed wafer cookies or crispy rice cereal
- 1 cup hazelnuts (toasted and finely chopped or whole for center)
- ½ cup Nutella or chocolate hazelnut spread
- 200 g (7 oz) milk chocolate, chopped or chips
- 2 tablespoons coconut oil (optional, for smoother coating)
Optional:
- 25 whole hazelnuts (if placing one inside each truffle)
Instructions
-
Toast the Hazelnuts
If using raw hazelnuts, toast them in the oven at 350°F (175°C) for 8–10 minutes, then rub off skins with a clean towel. Let them cool. -
Make the Filling
In a bowl, mix together the crushed wafers or rice cereal, finely chopped hazelnuts, and Nutella until well combined. The mixture should be sticky and hold together when pressed. -
Form the Truffles
Scoop out small portions (about 1 tablespoon) and roll into balls. If using whole hazelnuts, press one into the center of each ball, then cover completely. -
Chill the Balls
Place the balls on a tray lined with parchment paper and refrigerate for 30–60 minutes to firm up. -
Prepare Chocolate Coating
Melt the chocolate and coconut oil together in a heatproof bowl over simmering water (or in short bursts in the microwave). Stir until smooth. -
Coat the Truffles
Dip each chilled truffle into the melted chocolate, coating completely. Let excess chocolate drip off, then return to the parchment paper. -
Set and Store
Allow truffles to set at room temperature or place them in the fridge for faster hardening. Store in an airtight container in a cool place.
Additional Notes
- You can use dark chocolate if you prefer a richer flavor.
- Use Nutella straight from the jar for easy mixing — no need to soften.
- Crushed wafers give the best authentic texture, but crispy rice cereal works for a crunchier bite.
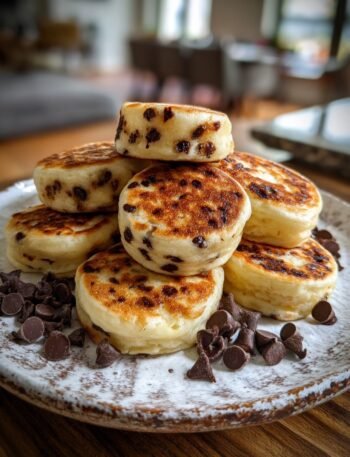
Hero Image
(Insert image of chocolate hazelnut truffles piled on a plate, as shown above)
Brief Introduction
These chocolate hazelnut truffles are a delicious, no-bake treat inspired by Ferrero Rocher. They combine the creamy smoothness of Nutella, the crunch of toasted hazelnuts, and the richness of melted chocolate for a festive sweet bite that’s perfect for holiday trays, gifts, or any celebration.
Step-by-Step Cooking Guide
Step 1: Prepare Nuts and Wafers
Toast hazelnuts and crush wafers or cereal. This builds the foundation of the crunch and flavor.
Step 2: Mix the Filling
Nutella acts as the binder for the crushed elements. Stir until everything holds together.
Step 3: Shape and Chill
Roll into balls. Chill for 30 minutes to help them hold shape during dipping.
Step 4: Coat in Chocolate
Use good quality chocolate for smooth dipping. Coconut oil adds gloss and a thinner consistency.
Ingredient Details and Substitution Tips
Ingredient Highlights
- Hazelnuts: The signature nut for this recipe. Toasting brings out flavor.
- Nutella: Acts as both binder and core flavor element.
- Milk Chocolate: Use baking chocolate or chocolate chips for coating.
Substitution List
- Almonds or peanuts can replace hazelnuts in a pinch.
- Peanut butter can be used instead of Nutella for a different flavor.
- Dark chocolate instead of milk chocolate for a richer result.
Equipment Alternatives
- Use a fork and spoon for dipping instead of fancy chocolate tools.
- No food processor? Place wafers in a zip bag and crush with a rolling pin.
Recipe Variations and Serving Suggestions
Flavor Variations
- Coconut: Add shredded coconut to the mixture.
- Salted: Sprinkle sea salt on the coating before it sets.
- Double Chocolate: Add cocoa powder to the filling for a deeper chocolate taste.
Serving Suggestions
- Serve chilled on a holiday platter.
- Wrap individually for gifts.
- Pair with espresso or after-dinner drinks.
Storage and Make-Ahead Information
Storage
- Store in an airtight container in the fridge for up to 2 weeks.
- Can be frozen up to 2 months. Thaw at room temperature before serving.
Make-Ahead Tips
- Make the filling and refrigerate it a day before coating.
- Dipped truffles can be stored long-term and still taste fresh.
Nutrition Information (Per Truffle – Approximate)
- Calories: 120
- Fat: 8g
- Carbs: 10g
- Protein: 2g
Allergens: Tree nuts, Dairy, Gluten (from wafers)
Frequently Asked Questions
Q: Can I make this nut-free?
You can replace hazelnuts with sunflower seeds and use a nut-free spread, but it won’t be quite the same in texture or taste.
Q: What kind of wafers should I use?
Use plain vanilla wafers or wafer rolls. Avoid cream-filled ones as they may be too soft.
Q: Can I use store-bought melted chocolate?
Yes, just ensure it’s good quality and smooth when melted.
Q: How do I keep them from sticking?
Place dipped truffles on parchment or wax paper to avoid sticking while setting.
Optional Personal Story
I started making these truffles during the holidays when store-bought options were either too expensive or packed with additives. This version uses just a handful of ingredients, and they’ve become a staple at holiday gatherings. Everyone loves the crispy bite and deep hazelnut-chocolate flavor.
Reader Interaction
Have you tried these chocolate hazelnut truffles? Let me know your twist in the comments. Snap a photo and tag #HomemadeTruffleTreats online — I’d love to see your results.