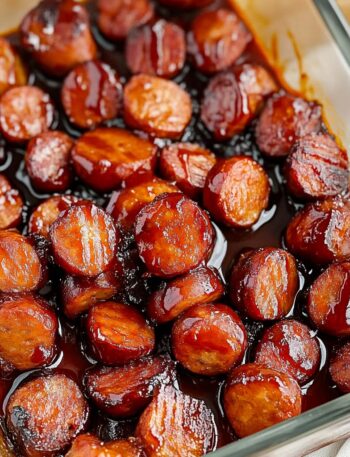
This Baked Sweet and Sour Chicken features crispy, golden chicken pieces coated in a perfectly balanced sweet, tangy, and savory sauce. Instead of deep frying, the chicken finishes baking in the oven, creating a delicious caramelized glaze that’s perfect served over fluffy rice.
Recipe Information
- Prep Time: 20 minutes
- Cook Time: 1 hour
- Total Time: 1 hour 20 minutes
- Servings: 6
- Course: Dinner, Main Course
- Cuisine: Asian-Inspired
- Difficulty: Easy
Ingredients
Chicken
- 4 boneless, skinless chicken breasts, cut into 1-inch cubes
- 1 cup cornstarch
- 2 large eggs, beaten
- ¼ cup vegetable oil
- Salt and black pepper, to taste
Sweet & Sour Sauce
- ½ cup granulated sugar
- ¼ cup ketchup
- ½ cup apple cider vinegar
- 2 tablespoons soy sauce
- 1 teaspoon garlic powder
- ½ teaspoon sea salt
Optional Garnishes
- Sesame seeds
- Sliced green onions
- Steamed broccoli
- Red pepper flakes
Equipment Needed
- 9×13-inch baking dish
- Large skillet
- Mixing bowls
- Whisk
- Tongs
- Parchment paper
Instructions
Step 1 – Prepare the Oven
Preheat your oven to 325°F (165°C).
Line a 9×13-inch baking dish with parchment paper or lightly grease it with cooking spray.
Step 2 – Season the Chicken
Pat the chicken pieces dry with paper towels.
Season lightly with salt and black pepper.
Step 3 – Coat the Chicken
Place the cornstarch into a large zip-top bag or shallow bowl.
Add the chicken pieces and toss until every piece is completely coated.
Step 4 – Dip in Egg
Beat the eggs in a shallow bowl.
Dip each cornstarch-coated chicken piece into the beaten eggs until evenly coated.
Step 5 – Brown the Chicken
Heat the vegetable oil in a large skillet over medium-high heat.
Cook the chicken in batches for 2–3 minutes per side, just until lightly golden.
The chicken does not need to cook through at this stage.
Transfer the browned chicken to the prepared baking dish.
Step 6 – Make the Sauce
In a medium bowl, whisk together:
- Granulated sugar
- Ketchup
- Apple cider vinegar
- Soy sauce
- Garlic powder
- Sea salt
Mix until smooth.
Step 7 – Bake
Pour the sauce evenly over the chicken.
Bake uncovered for 1 hour, stirring or turning the chicken every 20–30 minutes so each piece becomes evenly coated in the sticky glaze.
Step 8 – Serve
Remove from the oven once the sauce has thickened and beautifully caramelized.
Serve immediately over steamed white rice or fried rice.
Garnish with sesame seeds and sliced green onions if desired.
Serving Suggestions
This dish pairs perfectly with:
- Steamed jasmine rice
- Fried rice
- Lo mein noodles
- Stir-fried vegetables
- Egg rolls
- Broccoli
- Snap peas
Storage
Refrigerator: Store leftovers in an airtight container for up to 4 days.
Freezer: Freeze for up to 2 months.
Reheating: Warm in the microwave or oven until heated through. Add a splash of water if the sauce becomes too thick.
Tips for Success
- Pat the chicken dry before coating for the crispiest texture.
- Brown the chicken before baking to lock in flavor.
- Stir the chicken during baking so every piece gets coated in the sauce.
- For extra crispiness, bake on a wire rack placed inside the baking dish.
- Add pineapple chunks or diced bell peppers during the last 20 minutes for a classic sweet and sour variation.
Nutrition (Approximate Per Serving)
- Calories: 470
- Protein: 34g
- Carbohydrates: 37g
- Fat: 18g
- Sugar: 21g
Frequently Asked Questions
Can I use chicken thighs?
Yes! Boneless, skinless chicken thighs stay extra juicy and work wonderfully in this recipe.
Can I make it ahead?
Absolutely. Prepare everything up to the baking step, refrigerate, then bake when ready to serve.
Can I air fry the chicken first?
Yes. Air fry the coated chicken until lightly golden before tossing it with the sauce and finishing it in the oven.
What vegetables can I add?
Bell peppers, onions, broccoli, carrots, snap peas, and pineapple chunks all pair beautifully with the sweet and tangy sauce.
Final Thoughts
This Baked Sweet and Sour Chicken delivers crispy chicken coated in a glossy homemade sweet and sour sauce that’s both comforting and incredibly flavorful. It’s an easy family favorite that tastes just like your favorite takeout—but fresher, crispier, and made right in your own kitchen.